SPARK PLUGS
5/8" Deep (Depending on Spark Plugs) Socket,
Anti-Seize Compound
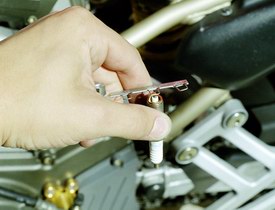
meatiest section (rather than the wire, which could rip out of the
boot).
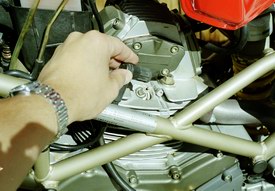
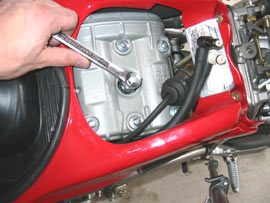
extension and remove the plug, taking care that any
debris that is down around the base does not get into
the cylinder.
other debris- you don't want that stuff in your
engine.
plugs is gapping. A plug's gap needs to be dialed in based on ignition
modifications, etc. A juiced ingnition needs a wider gap than stock,
etc. If stock, consult your underseat spec chart or shop manual for
the proper gap, then use one of these handy gapping tools to
measure. Most of the time they come pretty close from the factory,
but I've had some way off ones. My engine is stock, so these were
set to 0.65mm
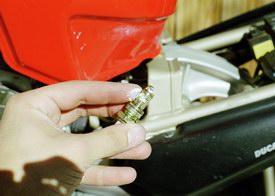
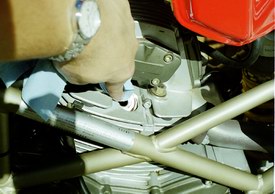
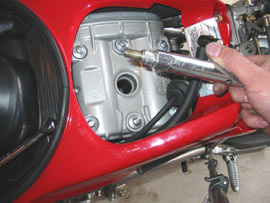
Here, I am rubbing on a little anti-seize compund. Because the
heads are not steel and the plug threads are, they can easily
become seized and/or damage the head. The compound is just a
little extra insurance.
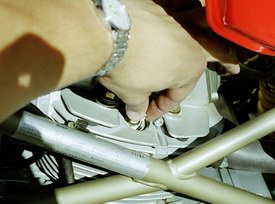
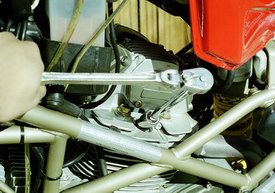
touches the head, then stop and move on...

but you can just as easily turn in the plug until it touches the head
and go another 1/4 of a turn, they are basically the same spec.
Whatever you do, don't overtighten them because the crush washer
will be destroyed.
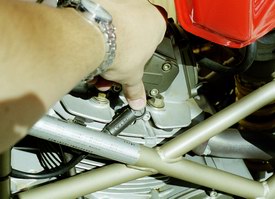
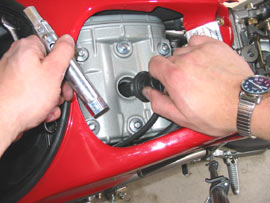
If you want to you can add a little electrical grease to the tip of the
plug to make it easier to remove the boot, but I've never found
myself needing it. I have the wires on and off all the time so there
is no time for it to seize! Now just move on to the other cylinder
and you're done.
NORMAL= brown to tan coloring, with no wetness or black/white marks and only slight electrode wear. Clean or
replace.
WORN= rounded electrodes, i.e. it looks as if they've been sanded or weathered. The electrode should look crisp and
edgy like it was when new. Replace with new ones.
RICH= dry sooty black coating over entire plug face. Play with the mixture (start by leaning out idle) and replace
plugs.
WORN SEALS / RINGS= oils deposits on plugs. Oil is leaking past the valve stem seals and/or piston rings and
should be fixed. Replace plugs.
OVERHEATED PLUG / ENGINE= plug is white and 'blistered' from too much heat. Either the plug is the wrong heat
range or the engine is running too hot. Check for an overly lean mixture, low oil / water level, vacuum leaks, or
anything that would cause the engine to run too hot. Replace plugs.
PREIGNITION= melted electrodes and ceramic. Ignition timing is most likely too far advanced, or the wrong octane
fuel is being used. Retard timing or increase fuel octane and replace plugs. Could also be caused by an overly lean
mixture or overheating engine (low oil level and/or water level). Replace plugs
GLAZING= cuased by sudden increases in combustion chamber temperatures (heavy acceleration). Check that your
carb's midrange jets/needles are rich enough or use a colder heat range plug. Replace plugs.
DETONATION= damaged plug, such as chipping, bending, etc. Most likely caused by the wrong fuel octane or lugging
the engine. Also caused by the wrong plug gap (too wide). Increase fuel octane / replace and correctly gap the plugs.
WATER IN COMBUSTION CHAMBER= white plugs. A fluffy white coating indicates water in the gas or a coolant
leak on liquid cooled engines. Replace plugs and add water remover to tank.
are those of myself and do not reflect those of Ducati or its affiliates. The "DUCATI" logo and "Circle D" are registered trademarks of Ducati Motor
Holding, S.p.A., all other content on this website is copyright 2006, Monster Man Productions.