model bikes), 10mm Allen Head Socket, Channel Lock Pliers
or a Filter Wrench, Oil, Filter,
New Crush Washers
need to be sockets rather than wrenches because you will need to torque them to the
correct setting. A torque wrench is required for all kinds of maintenance, so now is the
time to bite the bullet and get one (reasonably priced ones are available at Sears and the
like). You will also need about 4 liters of your preferred oil (I use 15w50 semi-synthetic
Motul, but if your engine has less than 2,000 miles I would not recommend synthetic
because the motor is still in the break-in stage). You also can't forget the oil filter and a
crush washer for the oil drain plug and a crush washer for the filter screen bolt. The
washers are cheap at 50 cents each, the filter is about $10, and the oil runs me $20. All
right, let's get started:
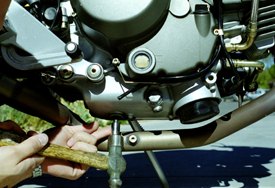
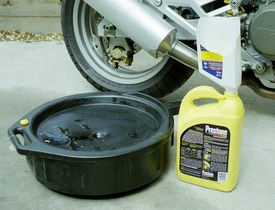
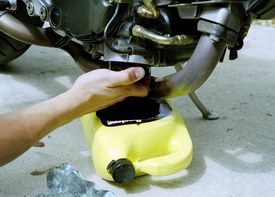
drain pan under the engine, and place the bike upright (like on a
stand). Next, take your 10mm allen and tap it into the drain plug with
a hammer (if necessary, just to make sure it is completely seated)).
This is done to ensure that the drain plug is not stripped, which is very
easy to do. After the socket is tapped in, you can remove the plug and
let the oil drain. I had a shorty drain pan during this shoot, but left it
behind when I moved. My new drain pan didn't fit under the bike, so
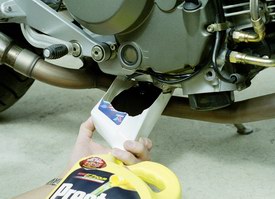
I rigged up this contraption. It's an oil bottle cut open and attached to
an antifreeze bottle. It works great in a pinch and was free to make.
You will also notice that the socket may not want to disengage from
the drain plug- don't worry, we will remove it once the drain plug is
back in (further down).
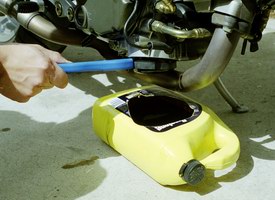
strap wrench in my case) and remove the old filter. It will
probably be on there very tight, especially if the oil has not been
changed before. After it is removed, you can let the oil drain
from that orifice for a while. Be sure the drain pan is underneath
to catch the oil that will come out. My new drain pan wouldn't fit
under the filter either, so I just cut a hole in the top of the
antifreeze bottle and it worked fine. Once the bottle was full, I
dumped it into the real drain pan and took it to the recyclers.
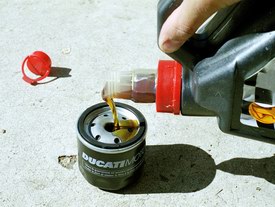
wait for it to settle, and keep adding until it is full. This is done to
ensure that the engine doesn't hit a dry spot in the lubrication chain.
Don't fill it all the way or it will spill everywhere when you try to
tighten it on again. Very lightly coat the rubber gasket with oil, then
spin it into place. When the filter just barely touches the engine
block, continue to spin 3/4 to 1 full turn, but no more. You don't want
to overtighten it.
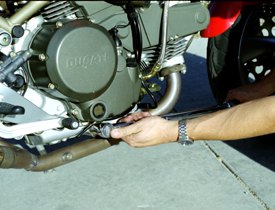
bit) and loosen the bolt head that is on the side of the engine, just
below and to the right of the oil level sight glass. Remove the bolt and
slide the filter screen out. On models with the 14mm allen outer, you
will now need to remove the 14mm allen inner, which actaully holds the
screen. On these models it is in there TIGHT, and you may need a
breaker bar. There may be some crud here and there, but you are
mainly checking for metal bits. If there are very tiny shavings
(especially during engine break-in), do not be alarmed. If there are
numerous shavings and chunks of metal, that could be a sign of several
things. The transmission gears could be damaged, or the rocker arms
could be flaking the chrome off (on four valve motors). Luckily, the
only thing I found on my filter was a chip of red paint. Clean it off,
replace the crush washer with your new one, put it back in, and
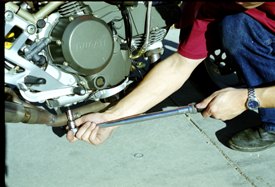
Also, do not use the torque wrench to remove the bolt as the picture shows- I simply did this to show where the bolt
was. Use a normal ratchet and socket or an end wrench.
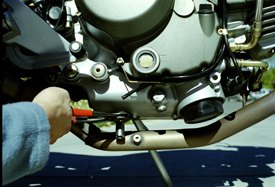
found on Ducati's website or in the service manual). Now, to get the socket out, I simply took a pair of pliers and
pried between the chrome portion of the socket and the face of the drain plug. It came out pretty easily that way.
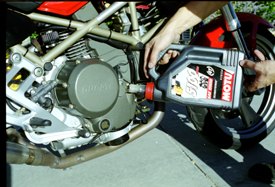
liters), but I ended up draining a little later. Just slowly add the oil and
constantly check the sight glass (with the bike level and turned off of
course, which requires a stand or a buddy), because you don't want the
engine overfilled. It should be between the two marks on the sight
galss. Once it's full, start the bike up. You'll notice that the oil warning
light may stay on, but if it doesn't go off after ten seconds you should
turn the bike off and wait for the oil to drain back down, then check the
level and fill accordingly. Then start it again and go for a ride.

upright again, then fine tune the oil level (which you may notice
has risen slightly). If you need to drain it, I would use the oil filter
screen bolt because of the stripping issue of the drain plug.
unacceptable. Many auto parts stores and gas stations accept used oil for recycling. Just funnel the old oil
into the container and take it to a recycling center. There- you're done. Congratulations.
are those of myself and do not reflect those of Ducati or its affiliates. The "DUCATI" logo and "Circle D" are registered trademarks of Ducati Motor Holding,
S.p.A., all other content on this website is copyright 2006, Monster Man Productions.