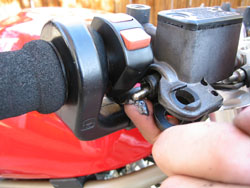
BRAKE/CLUTCH LEVERS
the first to break in a fall, so it's a good thing. Luckily I haven't been that
unfortunate, but I can still show how it's done:
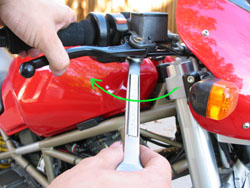
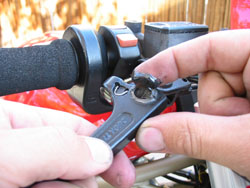
with an end wrench or socket.
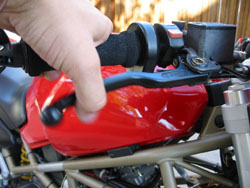
flying, as it has pressure applied to it by the brake (or clutch) piston.
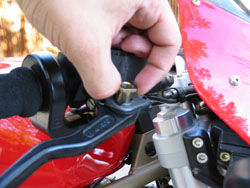
activator doesn't fall out, and that the piston rod doesn't fall out.
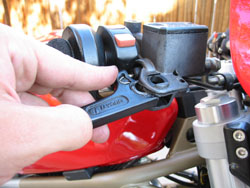
should remove them to grease them up.
grease should hold it. Then lube the end.

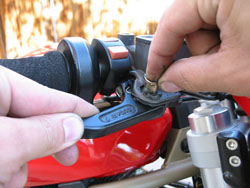
then stick it back in place, and the grease will hold it in
position until you get the lever back in.
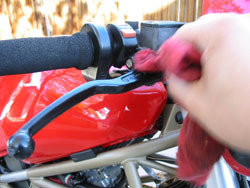
lube the pivot points- that includes the two ring shapes on top and bottom,
the bowl that the piston rides in (in the screw on the handle), and the
leading corner.
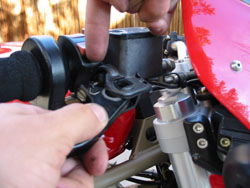
making sure that the piston rod fits into the little bowl of the screw, and
that the brake lever switch activator stays in position (ignore this for the
clutch side).
good thing, you'll wipe up the excess later.
and there is no binding.
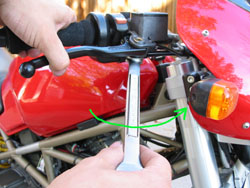
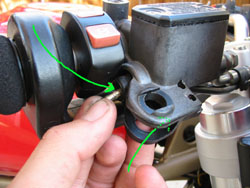
testing the operation of the lever. You should grab the lever, activate it a
bunch of times, and while doing that, tighten. You will notice that it
operates smoothly up to a point, and when the nut is too tight, the lever
doesn't spring back. Tighten it only up to the point where the lever still
operates smoohtly without hanging up. As a last precaution, you can run a
zip tie or safety wire through the lever to make sure it doesn't go south
when you're trying to brake!
out of whack. You will need to adjust it for proper and safe braking- if adjusted improperly the brakes could lock up
or not work at all.
brake or clutch lever (fluid will jump high if you operate it normally), and check for surface movement in the
reservoir. Continue to slightly screw in the adjuster and check for fluid movement on top until there is no more
(surface movement indicates that the return circuit is open, which is necessary to operate correctly). When you no
longer see movement when pulling the lever, back out the adjuster counterclockwise one full turn, and check for
movement again. You should be set then. Check for proper release and operation before heading around the block
just to be safe.
herein are those of myself and do not reflect those of Ducati or its affiliates. The "DUCATI" logo and "Circle D" are registered trademarks of Ducati
Motor Holding, S.p.A., all other content on this website is copyright 200, Monster Man Productions.