PLUS: HOW TO KILL BRAKE NOISE
aluminum can (for the rear brake trick), Disc Brake quiet
or similar (optional), sandpaper, brake parts cleaner, rag
bleeding is necessary because the lines and pads are two separate systems, so it's out and
in with the pads fairly quickly. This job is performed on the rear caliper, but the process is
identical on the front brake. I also decided to test a tech tip regarding quieting down the
awful groan of the rear disc brake in slow stopping conditions. It sounds like a garbage
truck, and I've tried all kinds of stuff to no avail. Then a member over at the Speedzilla
Ducati board suggested making a shim out of aluminum can to soak up the noise. I was
willing to try anything, so I did it here for your amusement. The preliminary results are
very encouraging. Stay tuned for further tests.
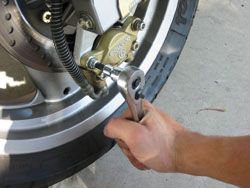
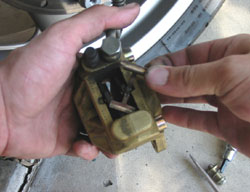
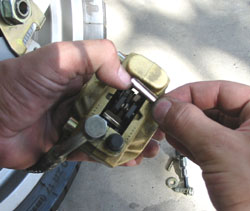
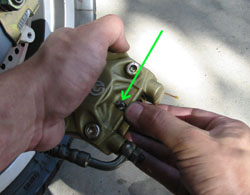
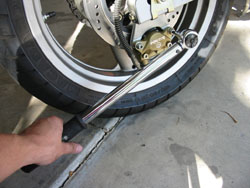
mounting bracket (don't loosen the two lower bolts that hold the
caliper together). It is possible to slide the pads out with the caliper
still on, but in my opinion it would be a pain to try to pry the piston
back in its bore while still mounted (you'll need to because the new
pads will be taller).
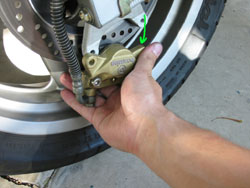
to say DO NOT press the brake lever, or you will never get the caliper
back on because the pads will lock together with the absence of the
rotor. If you are worried, you can also clamp the brake line shut with
Vice Grips or something similar.
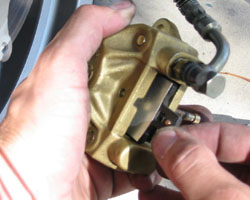
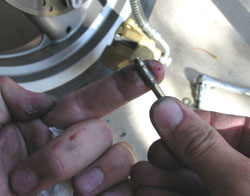
the pad holding pin's retaining clip
off, then pry the retaining pin out.
It's a tight fit, but should come
out easily with a tap.
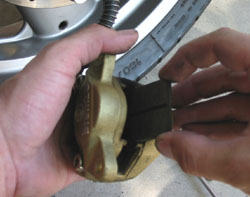
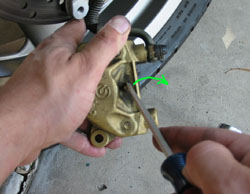
should come right out.
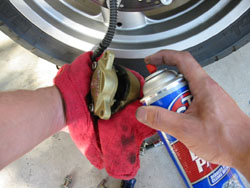
caliper up using some disc brake cleaner. Be careful not to get it on any
painted surfaces, and wipe it off of the caliper quickly. Once clean, I'd
neutralize it with some soap and water- the brake cleaner does eat finishes.
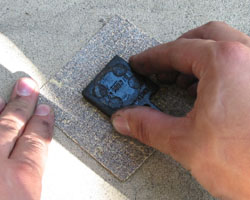
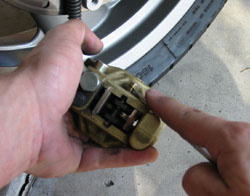
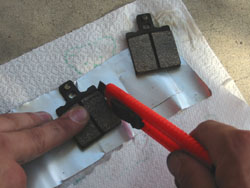
little scuff job for proper seating. The pads need to mate with the surface
of the rotor perfectly, and if glazed or brand new it's hard to get them to
do that. So, just buff some of the top coating off with sandpaper.
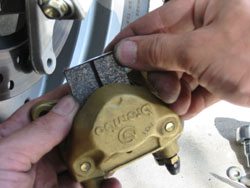
surface (the grease will ruin braking power), and making sure that the pad
surface faces the rotor.
on the backside of the pad, and the direction it is facing.
note of the direction- mine has a very light arrow facing forward. I
don't know if it makes a difference, but I wasn't willing to find out.
By forward, I mean forward when the caliper is mounted on the bike.
retaining pin. This is also a source fo vibration noise.
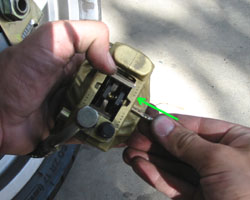
the hole, through the first pad,
over top of the clip, through the
second pad, and finally out the
other hole in the caliper, then
re-install the retaining clip.
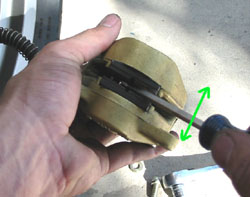
installing new pads- the distance between them is now smaller), just insert
a small screwdriver and gently pry them apart. It shouldn't be hard to get
them to separate.
but be sure to check your specific bike's spec before tightening.
And, you're done. Now you need to seat the pads to the rotor.....
braking and noise. To do this, take your new pad out to a long stretch of road and perform several long, hard stops
form a high speed so as to heat the pad and rotor up and mate the two surfaces. After the stops, allow the pads to
cool down by not using them. Once cool, perform several more stops, and let them cool. At that point, the pads
should be pretty well mated to the rotor. The key is to avoid overheating them, yet still get them up to temperature.
That is why you take a break between stops. If it doesn't work (you get noise and poor stopping power), the pads
have probably been glazed and you'll need to sand off the top a bit and start over. It's a tricky process, but worth it
for maximum braking efficiency.
those of myself and do not reflect those of Ducati or its affiliates. The "DUCATI" logo and "Circle D" are registered trademarks of Ducati Motor Holding, S.p.A.,
all other content on this website is copyright 2006, Monster Man Productions. If you would like to link to my page, feel free to do so.