Fluid, WET Rags at the Ready, Phillips Screwdriver
be harmful to your bike and could cause severe injury in the event of a crash. If you are
at all unsure of your ability to perform this procedure correctly, PLEASE do not attempt to
do so.
Bleeding the brakes involves draining the air bubbles out of the reservoir, lines and
calipers so that only fluid remains. This is done through a nipple in each of the calipers,
and the fluid is expelled out but prevented from going back in, hence the term "bleeding".
Air shouldn't be in the system, and makes its way in through leaks in the line, or if the
level is low and the bike leans way over, it sucks air.
It's necessary to bleed the brakes because air in the system decreases
braking power or diminishes it completely. Air compresses more than brake
fluid. When you pull the handle, it compresses the air in the system before
it pushes the fluid into the calipers to clamp the rotor, so most if not all of
the brake lever travel is wasted and not converted to braking force. The
same goes with the clutch- see my clutch page for info on bleeding your slave
cylinder.
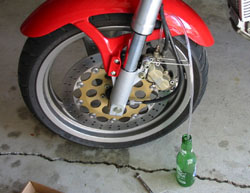
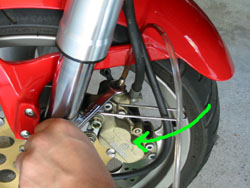
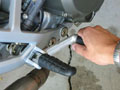
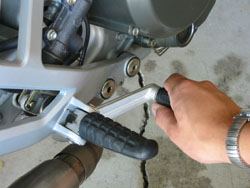
To start bleeding your brakes, you'll need to slip the tubing over the bleeder
nipple on the caliper, and feed it into an empty container.

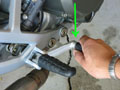
the brake lever, and one hand on the wrench on the bleeder nipple.
then HOLD
CLOSED.
closed, loosen the bleeder screw. The
pressure at the handle will drop, and
fluid will flow into the tube, along with
air bubbles no doubt. Don't be
alarmed- just keep the pressure on the
handle and continue to force fluid into
the tube. Stop the handle before it
reaches the handlebar by closing the
bleeder. The best way to do it is to hold
firm pressure on the handle, but only
loosen the bleeder a bit, so you have
more control over it.

eye on the fluid level- it depletes QUICKLY, and if you run out of fluid in the
reservoir it will suck air and you'll have to start over. I'd check after every
three bleedings. As soon as no more bubbles, not not even one, comes out with
the fluid, you're done. Just kink the hose and let the fluid flow to the
container, and pop it off.

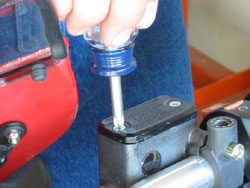
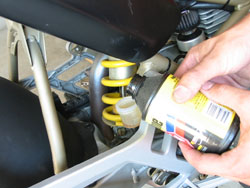
cover it back up. Be sure to use only
DOT 4 or 5.1 fluid. DOT 3 isn't heavy
duty enough, and DOT 5 is a different
formula that eats the seals in the
master cylinder. I use 4 because I
can't find 5.1 at the local store. 5.1 is
better, but 4 works fine for me.
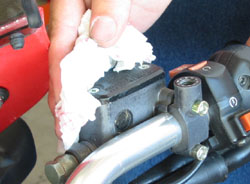
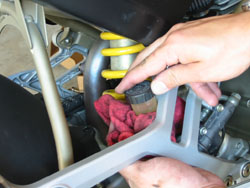
always flows out when I tighten the lid down. That's why you need the wet
rags handy- brake fluid is terribly corrosive and will damage paint in a matter
of minutes.
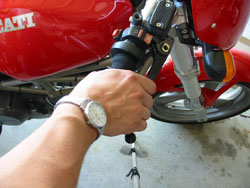
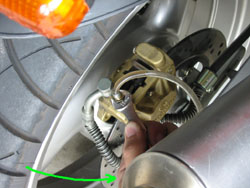
bottom and bleed it there. I have done that and never had a problem. However, if you consistently have a mushy feel
there is probably an air pocket caught in there- to fix this, the manual suggests moving the caliper to the top side of the
rotor for a proper bleed, so I have revised my page.
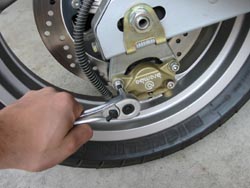
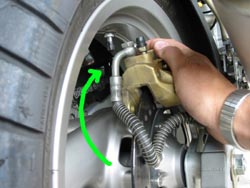
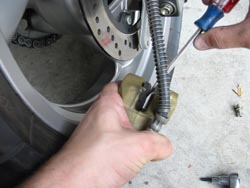
line is not kinked, then mount it on top of the rotor.

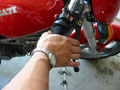
tube leading into a container. Then you'll
mount your 11mm wrench on the nipple, grab
the lever, and go to work.
then HOLD
CLOSED.
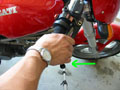
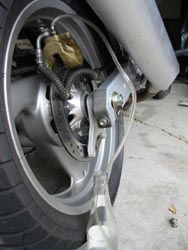
brake- pump it up, hold pressure on
the lever, and at the same time
realease the bleeder nipple. Fluid and
air will come out.

way and when it is about to run out of
travel, close the bleeder screw and
release the lever. Then start over
with the pumping sequence. Perform
until no more air comes out of the
tube with the fluid.
won't run out of lever travel quickly, and you can make sure you don't run out of fluid in one stroke. You'll need to
press the lever harder, but overall it is a much more controlled action.
reservoir is smaller and will empty sooner. Keep a close watch. When
finished, top it off, then wipe off all the surrounding areas with brake fluid on
them and close the lid.
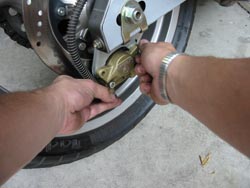
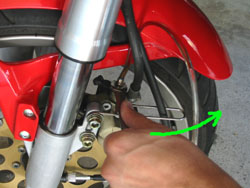
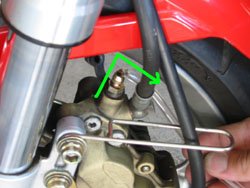
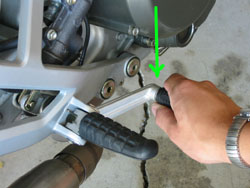
twist the line back into position, and
pry the pads apart with a screwdriver
in a gentle motion. Then mount it
back to the bracket to the specified
torque (about 25 ft-lbs).
the bleeder screws, DON'T wrench them down, just snug them up tight. They are easy to strip. And one more thing-
watch where the fluid gets- if at all possible, leave the lids on the reservoirs while bleeding to prevent a jet of fluid
from shooting into the air. Good luck!
those of myself and do not reflect those of Ducati or its affiliates. The "DUCATI" logo and "Circle D" are registered trademarks of Ducati Motor Holding, S.p.A.,
all other content on this website is copyright 2006, Monster Man Productions. If you would like to link to my page, feel free to do so.