could be harmful to your bike and could cause severe injury in the event of a
crash. If you are at all unsure of your ability to perform this procedure correctly,
PLEASE do not attempt to do so.
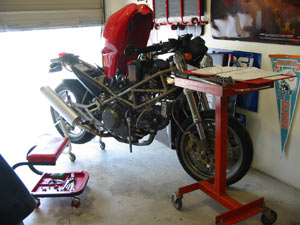
one prepared. As you can see, the garage is
clean and I have all my tools laid out along
with my service manual. I even bought one
of those roller seats because I knew I would
be spending a lot of time down low and I
hate rolling in the dirt. Familiarize yourself
with the procedure before you begin.
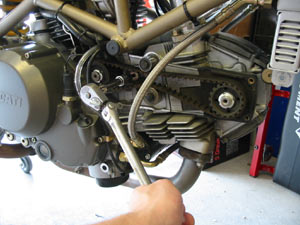
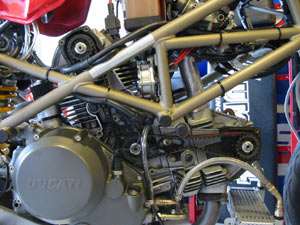
the little stuff to get to this point. I put her up
on a rear stand, stuck her in 5th, removed the
plugs, removed the side covers, and turned the
rear wheel by hand until the tick mark on the
flywheel (other side of engine through site
glass) lined up with the arrow (see picture).
At this point, the tick marks on the three gears
should line up......
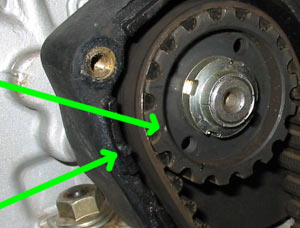
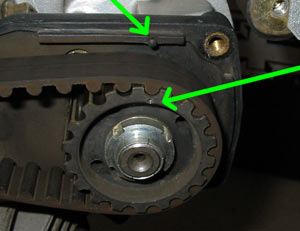
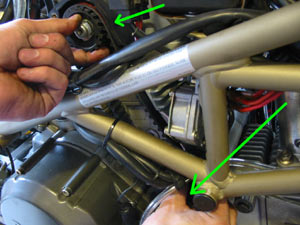
gear will align with a raised nub on the
rubber portion of the cover mount.
the horizontal cylinder cam gear will align with a raised nub on the rubber portion of the cover mount
as well. All three of these points, plus the tick mark on the flywheel, should all line up together at TDC
on the horizontal cylinder. You want to be at this point before removing the belts. If you don't have an
indicator on each of the three gears, make on on the one that's missing it (i.e., take a paint marker or
something and mark a fixed point.
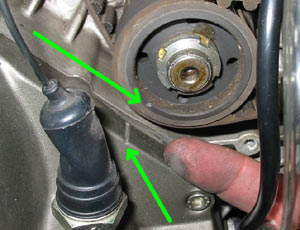
worry about the gears getting out of alignment since the horizontal is easy to move back into position since
there is no tension on it from a spring (but don't get wacky and try to spin it all the way around! ;)
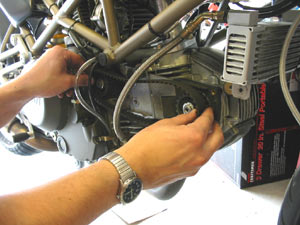
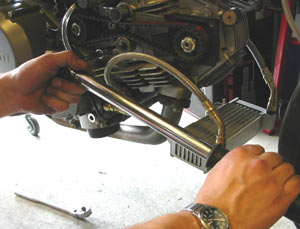
and pop off the belt. The cam gear has a bit of tension
on it that when nudged it will shoot either to the right or
left. In other words, it does not want to stay in one
spot and that makes it hard to get the belt on without
moving a tooth. But it's not near as tricky as I thought
it would be. So, while holding the cam gear in place by
hand with the nub and dot lined up, slide the belt on
starting at the bottom, then top, then bottom, then top.
It's easy enough to do that without getting off a tooth.

I have the rocker cover off just so I could see
what's up. I was a little confused at first because
I thought it should have tension on it, but
everything checked out so don't worry about that.
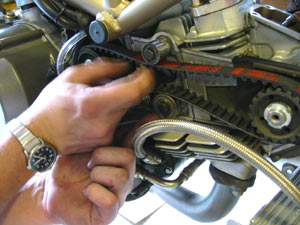
when the tensioner is on, the gears line up better
with their reference marks, and you'll easily be
able to tell if they are off one tooth.
make sure it's in the right spot. You don't want
to see the results of a belt that's off any amount.

tension, I just ran it around a couple times
using the rear wheel to check for any binding I
may have missed. Everything checked out
fine, so it was time to torque.
I torqued my roller tensioner bolts to 25Nm (after
setting tension of course).
a carbed bike it takes a bit to start since the bowls may have dried from cranking it). I took her for a ride
and got it good and hot, then checked tension, then let it cool, and checked again. You'll notice after a
couple heat-cool cycles the belts will loosen, so you'll need to re-tension a little later. After that they seem
to be good (I left my inspection covers off for a while to keep an eye on them). Easy, huh? I wish I'd
have done it sooner!
and views expressed herein are those of myself and do not reflect those of Ducati or its affiliates. The "DUCATI" logo and
"Circle D" are registered trademarks of Ducati Motor Holding, S.p.A., all other content on this website is copyright 2006 DESMO.